Compatibility: Compatible with Shopify 2.0 FREE themes ONLY
Image sliders are a great way to showcase your products, promotions, and brand on your Shopify page. An image slider allows you to display multiple images in a slideshow format, which can grab the attention of visitors and provide a visually appealing experience.
With just a few lines of code, you can create a slider and arrange it with your Shopify page content. It's important to note that spacing does affect the space before and after the slider, so be mindful when adjusting the code. With this simple and customizable solution, you can create a stunning image slider to showcase your products and promotions on your Shopify page. So why not add an awesome image slider today and take your Shopify page to the next level?
Please check our demo store before making a purchase. Password: made4uo
What are Image Slider?
An image slider is a user interface element that displays a sequence of images that can automatically rotate or be manually controlled by arrows.
Why use Image Slider?
Reasons to add an image slider to your Shopify store:
Showcase products, promotions, and brand: Image sliders can grab the attention of visitors and provide a visually appealing way to display your products, promotions, and brand.
Additional Considerations
- The article mentions that some code editing might be required if your Shopify admin page code has been changed.
- You can customize the position of the slider by changing the alignment of the first image (left, center, or right).
What you are buying:
- Add an image slider on the Shopify page
- Slider size is half of the page container
- Change the position of slider in the page
- Height of the slider is affected by the maximum image height
- Make sure to have images with portrait size or landscape grouped together
What makes our code better:
- We do not use external libraries, with that being said, our code will have no to minimal effect to your website's speed performance
- We do not leave or add codes use to advertise for our website
- Our code is mobile friendly
Any issues related to the code will be fix with no additional cost, excluding code customization requests. Simply contact us with "Chat with us." We are just a button away.
Steps on how to add Image Slider
Step #1. Open your code editor
From you Admin page, go to Online store, then Themes. Choose the theme you want to edit, then click the three dots, then Edit code
Step #2. In Section folder,
Open the main-page.liquid.
Step #3. Relace the code
Replace the whole code with the code below. Make sure to SAVE.
Step #4. Create a page
We need to create a page. From your Admin page, go to Online store, then Pages.
Step #5. Write the page
But when you want the slider to enclose the image, add the text below before the first image. Make sure to not add spaces.
See image below on how the "===page-slider===" is added before the first image. NOTE: Do not add quotation marks (")

Step #6. Add text
Add text below after the last image. Please follow on how it is written below.
See image below on how the "===/page-slider===" is added after the last image. NOTE: Do not add quotation marks (")

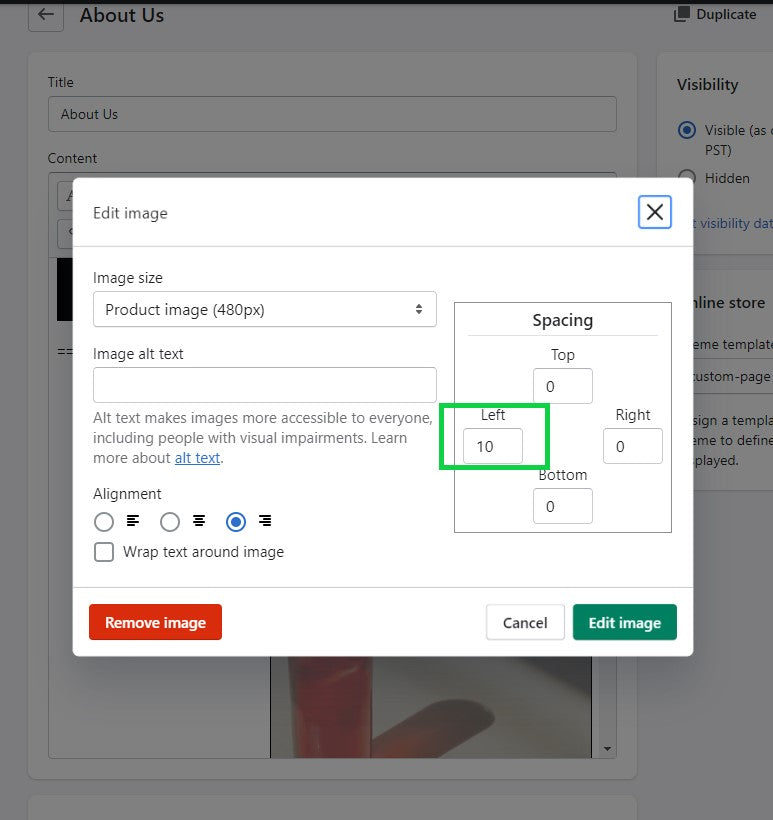
See the image below, how to make a space between the next image that is not included in the page-slider.
Click the image that you want to place beside the slide. Make sure to add a space on the left. For this example below, I set it to 10.
Step #7. Change position
To change the position of the slider, make sure to change the alignment of the first image only inside the slider. Click the image, then change the Alignment to left, center, or right. See image below.

Step #8. Save Changes.
By clicking the SAVE button on the right hand upper corner.
If you are having issues at times, it might be because some code was changed in your Admin Page. Make sure that the code for the ===page-slider=== is enclosed by a <p> or <p><span>. You need to click the "<>" to see the code. See image below

If you are having troubles, just contact us with "Chat with us."
Conclusion
Image sliders can be a powerful tool to grab attention and showcase your best offerings on your Shopify store. While the method described in this article uses paid code, it provides a user-friendly option for those comfortable with basic code editing. Remember, numerous alternatives exist, including free Shopify apps or even custom coding your theme for complete control. Regardless of the method you choose, consider these key points: ensure mobile-friendliness, optimize image sizes for fast loading times, and keep your slider concise and visually engaging. By implementing an image slider strategically and effectively, you can elevate your store's visual appeal and ultimately drive customer engagement.
Copied!